Getting started with Snovai
-
Step 1
Install the Chrome extension
Snovai runs as a Chrome extension that opens as a sidebar inside ServiceNow. Install it from the Chrome Web Store, then navigate to your ServiceNow instance and open the extension from the Chrome toolbar. The sidebar will appear on the right side of your screen.
Snovai is built and tested on Chrome. It may load on Edge, but Chrome is recommended for the best experience in version 1.0.
-
Step 2
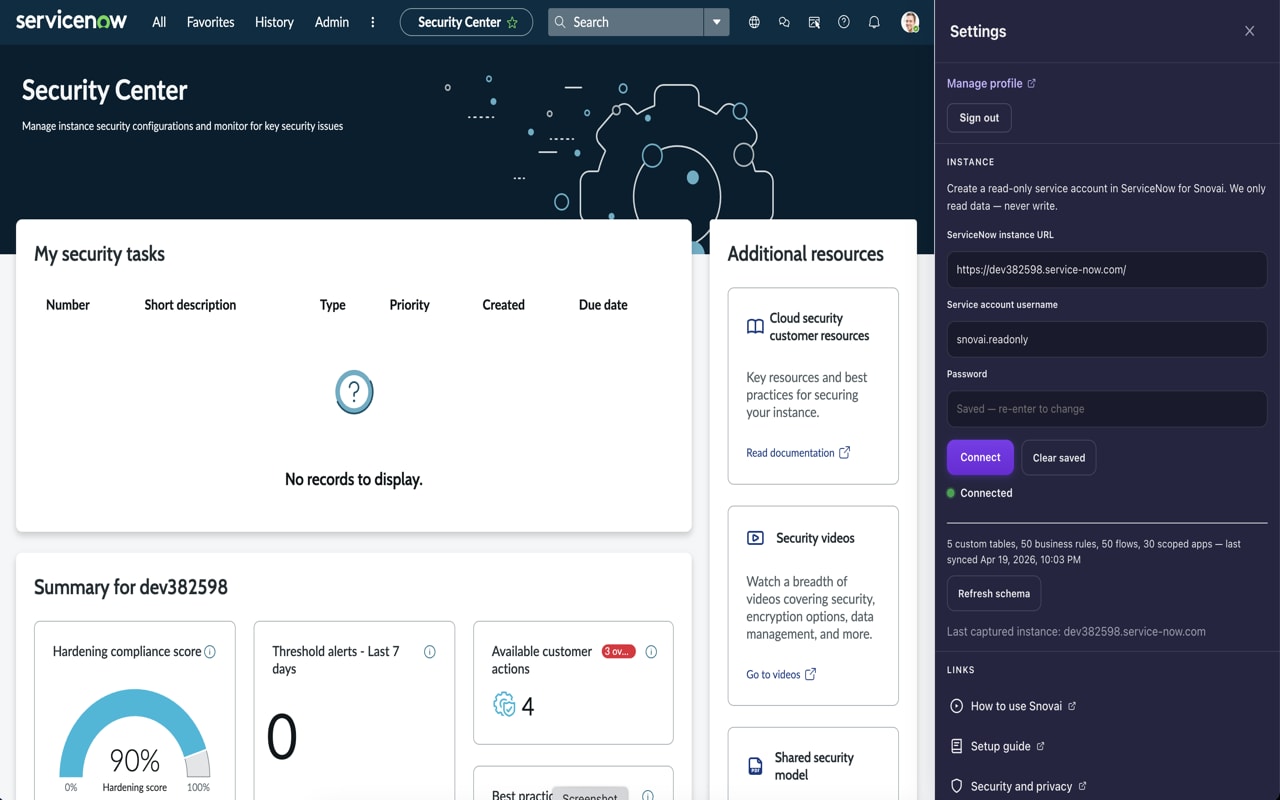
Create a read-only service account
snovai.readonlyIn your ServiceNow instance, go to User Management and create a new user. Use the recommended user ID above or your own. Assign the roles snc_read_only and itil. Do not assign admin. Admin access is not required and not recommended. This account is used by Snovai to query your instance securely in read-only mode.
If Snovai cannot query certain tables, your service account may need additional module-specific roles. For example, SPM requires pmo_user, HRSD requires sn_hr_core.read, and GRC requires sn_grc.user. If you run into access issues, email support@snovai.io and we will help you configure the right roles for your environment.
-
Step 3
Generate credentials
Set a strong password for the service account. Note down the instance URL, username, and password. You will need these in the next step.
-
Step 4
Connect your instance
Open the Snovai sidebar inside ServiceNow. Go to Settings and enter your instance URL, username, and password. Click Connect. You should see API Connected in the top bar.
-
Step 5
Run your first query
Once connected, try asking Snovai something like "Show me the last 5 incidents assigned to me" or "Check the sys_log for errors in the last hour." Snovai will query your live instance and return real data with clickable record links.
-
Step 6
You are ready to build smarter
Snovai is running. Ask it anything about your instance, your platform configuration, or the ServiceNow platform itself. See everything it can do.